Deep Sky Lucky Imaging Tutorial: Part 2 - Lucky Imaging Session MrCrazyPhysicist 1:05:14 1 year ago 2 581 Далее Скачать
Deep Sky Lucky Imaging Tutorial: Part 1 - The Equipment MrCrazyPhysicist 21:10 1 year ago 4 724 Далее Скачать
Deep Sky Lucky Imaging Tutorial: Part 3 - Lucky Imaging Data Evaluation MrCrazyPhysicist 15:25 1 year ago 1 059 Далее Скачать
2500+ Photos Taken to Get This ONE Shot! - Deep Sky Lucky Imaging lukomatico 20:01 3 years ago 20 094 Далее Скачать
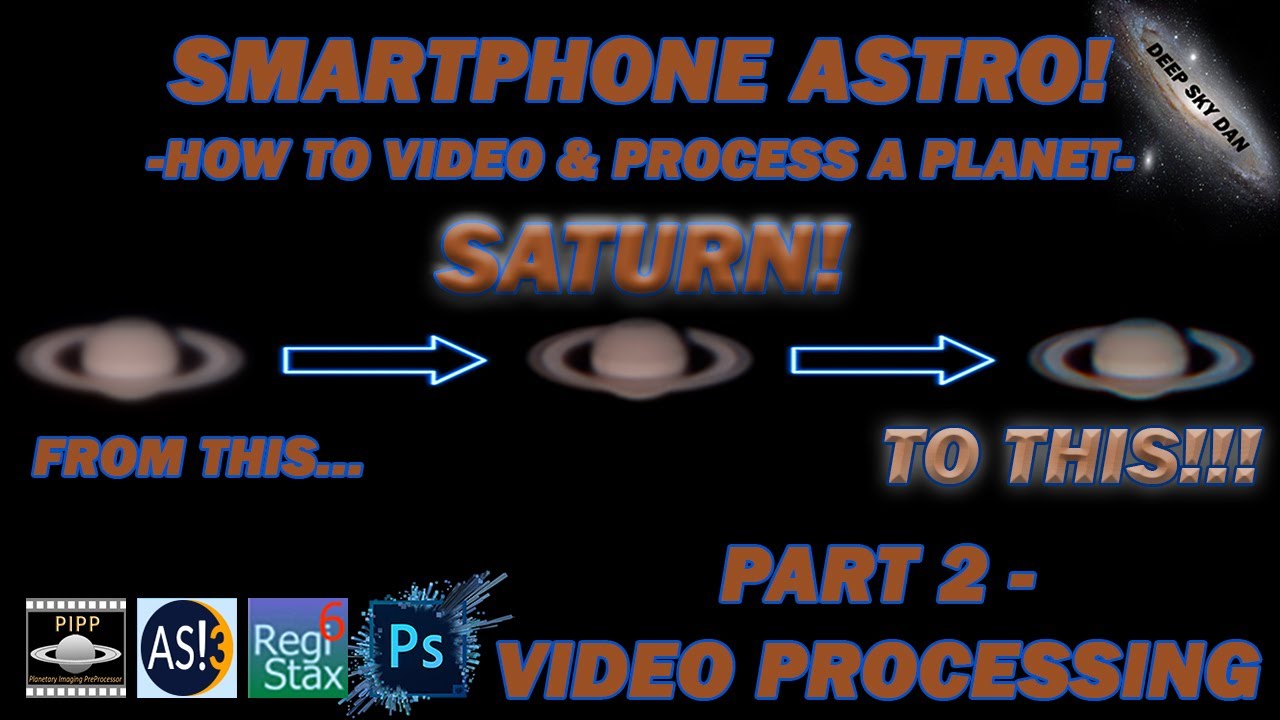
SMARTPHONE ASTRO! How To Video & Process A Planet! SATURN! Part 2 - Video Processing (Lucky Imaging) Deep Sky Dan 1:02:54 2 years ago 890 Далее Скачать
Andromedas Parachute - SharpCap | EAA | lucky imaging | through my Celestron C14 telescope pixlimit 4:10 2 years ago 2 404 Далее Скачать
Lucky imaging the Orion Nebula with my 16" Dob Damien K's Astrophotography 1:47 8 months ago 952 Далее Скачать
Astrophotography Basics: What Should Your Images Look Like? AstroBackyard 8:25 1 year ago 170 566 Далее Скачать
Astrophotography Image Processing - Lucky Imaging Down to Earth Astronomy 12:33 4 years ago 6 642 Далее Скачать
Astrophotography For Everyone | Lucky Imaging Down to Earth Astronomy 12:50 6 years ago 4 010 Далее Скачать
Astrophotography Tutorial: Image Stacking in DeepSkyStacker AstroBackyard 10:26 3 months ago 24 178 Далее Скачать
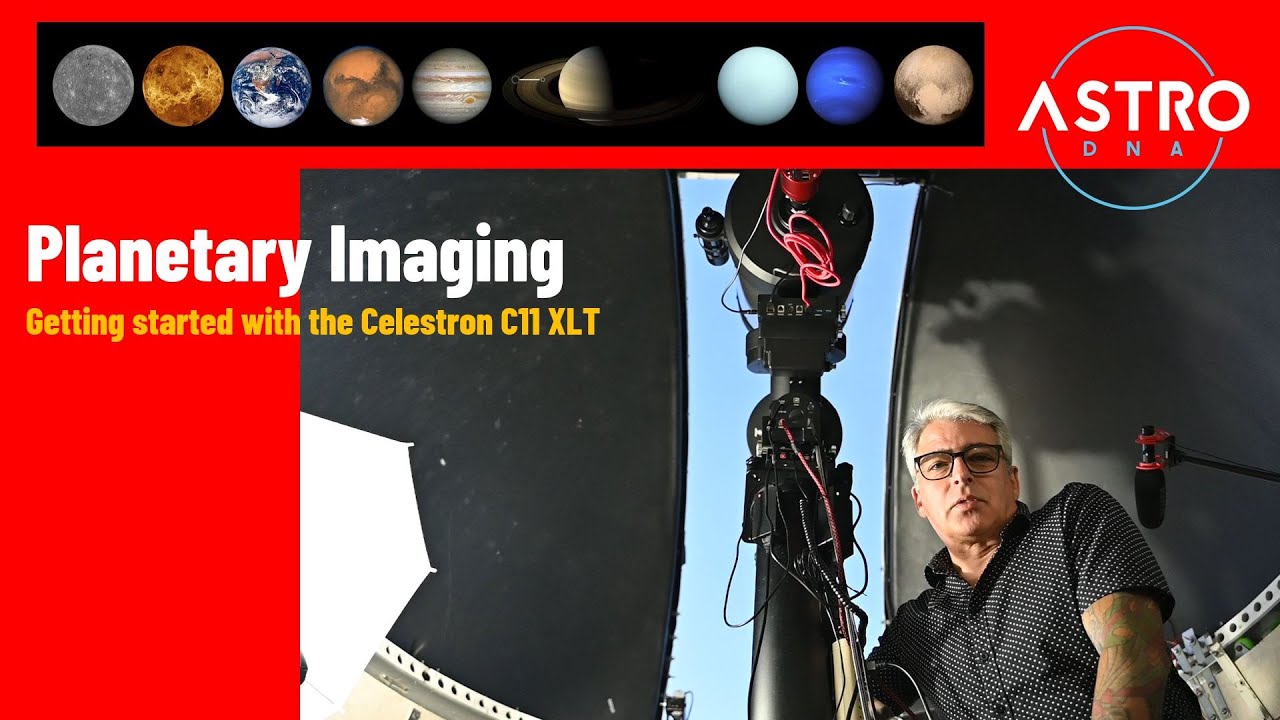
Planetary Imaging with the Celestron C11: Beginners Guide to Lucky Imaging Setups AstroDNA Observatory 25:28 1 month ago 2 045 Далее Скачать
Ultra High-Resolution Deep Sky Imaging | 2024-06-30 The Astro Imaging Channel 1:14:57 Streamed 2 months ago 4 533 Далее Скачать
'Lucky imaging' capture stunning photos of Jupiter WKMG News 6 ClickOrlando 0:46 4 years ago 506 Далее Скачать
Pakistan education system what a beautiful environment WOW🤣🤣 MDCAT Chemistry (Dawood khan) 0:16 2 years ago 5 001 575 Далее Скачать
20 Tips for Taking Photos of Planets (in 11 minutes) Dylan O'Donnell 11:14 6 years ago 180 287 Далее Скачать